One important step that should never be overlooked before bringing your MacBook or iPhone in for repair is backing up your data. This is because resetting the device or reinstalling the operating system may be necessary for certain repairs, such as screen replacement, battery repair, or logic board problems. If you don’t have a good backup, you could lose your important files, contacts, messages, and pictures forever
To help you prepare this guide explains how to make a backup of your MacBook or iPhone before repairing it, ensuring that your data is secure and readily recoverable.
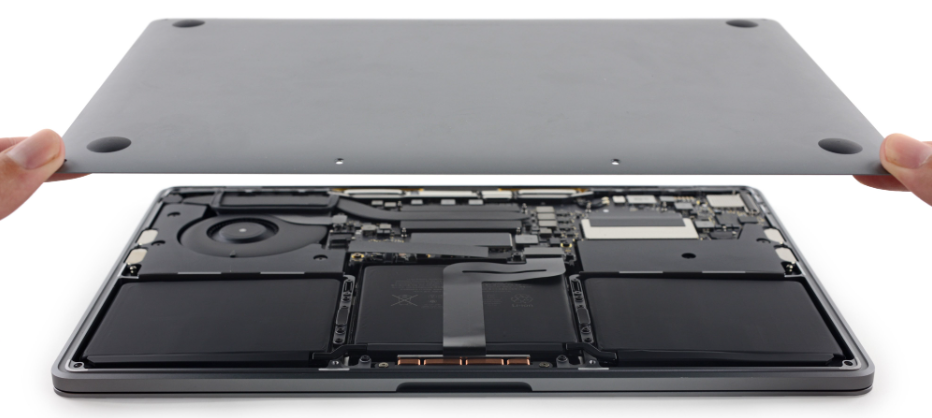
Poor Quality Components Impact Device Life
Many low-cost repair shops often use poor-quality or fake repair parts.
While such components appear to be like original repair parts sold by Apple, they resist the manufacturer’s standards of functionality, longevity, and safety.
When repair shops use low-quality parts, your screen may lose touch functionality, your battery may drain faster, and your internal components may fail.
You would end up repairing your device several times if your screen loses touch functionality, your battery drains quickly, or your internal components fail.
How to Back Up Your iPhone Before Repair
You can use a computer or iCloud to create a backup of your iPhone. For optimal protection, it is advised that you use at least one of these techniques.
iPhone backup using iCloud.
The simplest and most widely used choice is iCloud.
Steps:
1. Connect your iPhone to Wi-Fi.
2. Go to Settings > tap your Apple ID.
3. Select iCloud > iCloud Backup.
4. Tap Back Up Now.
Until the backup is complete, make sure your phone remains powered on and connected to Wi-Fi. You can verify that the backup was successful by looking at the backup time.
Tip: Before you begin, make sure you have adequate iCloud storage.

Back Up iPhone Using a Mac or PC
A complete local copy of your data is produced by a computer backup.
Using a Mac (macOS Catalina or later):
1. Use a USB cable to connect your iPhone.
2. Open the Finder.
3. From the sidebar, choose your iPhone.
4. Select “Back Up Now.”
On older versions of macOS or Windows:
1. Open iTunes.
2. Connect your iPhone.
3. Choose Back Up Now after selecting your device.
Turn on Encrypt Local Backup to store Wi-Fi settings, passwords, and health information for increased security.
How to Back Up Your MacBook Before Repair
A complete backup is necessary if your MacBook is being repaired.
Make a Time Machine Backup of Your MacBook
Apple’s built-in backup program is called Time Machine.
What you require:
A large enough external hard drive
Steps:
1. Attach the external drive to your MacBook.
2. Select System Settings > General > Time Machine..
3. Choose the drive by clicking Add Backup Disc.
4. Start the backup procedure.
Time Machine makes it simple to restore all of your Mac’s files, applications, and settings by taking a full snapshot of the system.
Manual Backup (Optional but Recommended for both iphone & macbook)
Make manual copies of necessary folders like these for added security:
Documents
Images, and Videos
Downloads and Desktop
These can be kept on a safe cloud service or an external drive.
Important Tips Before Giving Your Device for Repair
- Verify that your backup is completed.
- If the repair centre requests, log out of iCloud.
- Turn off Locate My Mac or Find My iPhone
- If necessary, remove your sensitive information.
- Until the repair is finished, keep your backup drive safe.
One easy way to avoid important data loss is to make a backup of your MacBook or iPhone before handing it over to the repair center. Having a recent backup ensures that your data is safe and easy to restore, no matter whether you use iCloud, a computer backup, or Time Machine.
Make sure your backup is complete before handing your device. It’s a simple step that can prevent a major headache in the future.
Frequently Asked Questions
Why should I back up my iPhone or MacBook before repair?
Repairs may require resetting the device or reinstalling the operating system, which can lead to permanent data loss if you don’t have a backup.
What is the easiest way to back up an iPhone?
The easiest method is using iCloud. Simply go to Settings > Apple ID > iCloud > iCloud Backup and tap “Back Up Now.”
Can I back up my iPhone without iCloud?
Yes. You can create a local backup using a Mac (Finder) or a Windows PC (iTunes).
Is a manual backup necessary?
While not mandatory, manually copying important files like documents, photos, and videos adds an extra layer of protection.
What should I do after backing up my device?
Verify that the backup is complete, log out of iCloud if required, and turn off Find My iPhone or Find My Mac before submitting your device for repair.